background

Monday, November 3, 2014

November Visiting Teaching Printables

I can hardly believe that we are already into November.  Where does the time go?  A month ago we had a lovely General Conference and for the Visiting Teaching Printables this month, I've decided to make up some art prints featuring some of my favorite conference quotes.  You will receive  the  4 art prints in 8" x 10", 4" x 6" jpeg files and as a full page printable for small hand-out cards.  I've also included a recipe card for Apple Fritters.  And new this month, you will also receive a printable page of miniature candy bar wrappers with a bag topper.  This is a great little gift idea for the sisters you visit each month or as a fun Relief Society handout.
You can purchase Novembers printables HERE.


Tuesday, October 7, 2014

October 2014 General Conference Printables - Freebie


General Conference was amazing this year, as always! There were so many great talks and along with all those great talks, come many great quotes.

I made up a Free art print to go along with President Monson's talk.  You can download it {HERE} as an 8x10, 5x7 or 4x6.  Print them at home or send to a photo lab. 


I have also made up art prints to go along with every talk during the 4 General Sessions of Conference.  You can purchase those {HERE} for only $5!!!!  All 28 art prints are available as 8x10 files.


Sunday, September 28, 2014

October Visiting Teaching Printables

I'm really excited about the Visiting Teaching Printables for this month.  Not only is the message awesome, as always!  But, it's Halloween this month, so I got to use some fun Halloween colors and designs.  AND I've added something new.  Included with the printable purchase, you still receive the full page decorative lesson, hand-out cards and recipe cards.  But now, I've also included a gift bag printable.  Just print out the printable on cardstock, cut out, fold and glue or tape together and there you go.  You have a cute little bag to fill with goodies to give to your sisters.  I've added 2 bag designs, one that says Happy Halloween and the other that has the message on it.  I hope that these fum gift bag designs will be helpful in your visiting teaching endeavors!

You can purchase the October Visiting Teaching Printables HERE.


NEW!  Gift bag printables!


Wednesday, September 17, 2014

Frozen Snow Princess Photo Booth Props

Are your kids in love with the movie Frozen?  Of course they are!  Mine too!  I thought a Frozen themed Princess party would be fun and so I came up with these cute prop set that matches the Frozen Movie colors.

I currently have them listed on sale for only $3.50.  You can purchase them HERE!


Saturday, September 13, 2014

September Visiting Teaching Printables

Purchase your September Visiting Teaching Printables HERE.  Only $2.00!


The listing includes:
✿ 8.5" x 11" page printable with 4 - 3.5" x 4.5" handout cards with a summary of the message on them
✿ 8.5" x 11" page printable Decorative Copy of the Visiting Teaching Message for the Month
✿ 8.5" x 11" page printable with 3 - 3" x 5" Recipe Cards
✿ 4" x 6" copy of the Message Card
✿ 4" x 6" copy of the Recipe card (Peanut Butter Dream Oatmeal Bars)

Wednesday, August 20, 2014

FREE Superhero Bottle Cap Collage Sheet

I've made a bunch of fun collage sheets with different popular images on them for my own use and I thought I would start loading them onto my blog as freebies.  Check out my tutorial on creating your own bottlecap necklaces HERE.  I also have a lot of other fun designs in my shops at OldMarket and OldMarketCorner.  And for LDS designs, check them out at GreenJelloSalad.

To print , just left click over the side of the image (not on the P).  Then right click on the image and go to “save image as” then save in a folder as a jpeg.  The page is set up to print out on 8.5" x 11" paper.  When printing, make sure your printers settings are set for 8.5" x 11" (letter) size and the "fit to page" button is not clicked.


Thursday, August 14, 2014

Bottle Cap Necklace Tutorial


By OldMarket
Supplies

BottleCaps – I recommend getting them with rings already attached, unless you are going to use them for magnets. 

Chains – Ball Chains or string work quite nicely.

Epoxy Dome Stickers 

1” designs printed on regular paper or cardstock or scrapbook paper – Check out my fun designs on Etsy at OldMarket, sports teams and 4x6 printables at OldMarket Corner or my LDS designs at GreenJelloSalad.

1” hole punch or Scissors

Modge Podge – or any similar decoupage glue.

Paint brush

(All of these supplies can be found at most Craft Stores.  For a better deal, especially if you are making a lot, I recommend looking around on Etsy.  You can often find bottlecap/ball chain/epoxy sticker combinations for great prices.)

Instructions

To begin, make sure you have all your supplies ready and set out.  Get your images printed out and use either the 1” punch or scissors to cut them out. 


If you are printing a collage sheet, you can use plain paper or cardstock.  Make sure you have them printed on a laser printer. 
“Paint” the flat surface on the inside of your bottle cap with modge podge. 


Place your image in the middle of your bottle cap.  Make sure you have it centered with the ring at the top.  Then paint another layer of modge podge over the top of your image.  


The Modge Podge will leave white streaks on the image, but they will dry clear.  Try to make sure there are no bubbles in the Modge Podge.  Set down the bottle caps and make sure they dry completely before moving on.


After the bottle caps are completely dry, place your epoxy sticker onto the top of your design.  


Press down firmly all over, especially around the edges.  


Be careful not to touch the sticky side with your fingers or onto any other surface.

Add a chain or string and you’ve made yourself a fun necklace.   


You can also add a magnet to the back, using a small amount of super glue. 
You can also go further by decorating your necklace with beads, either wire-wrapped around the split ring at the top or strung along the chain.  The ideas are endless.  

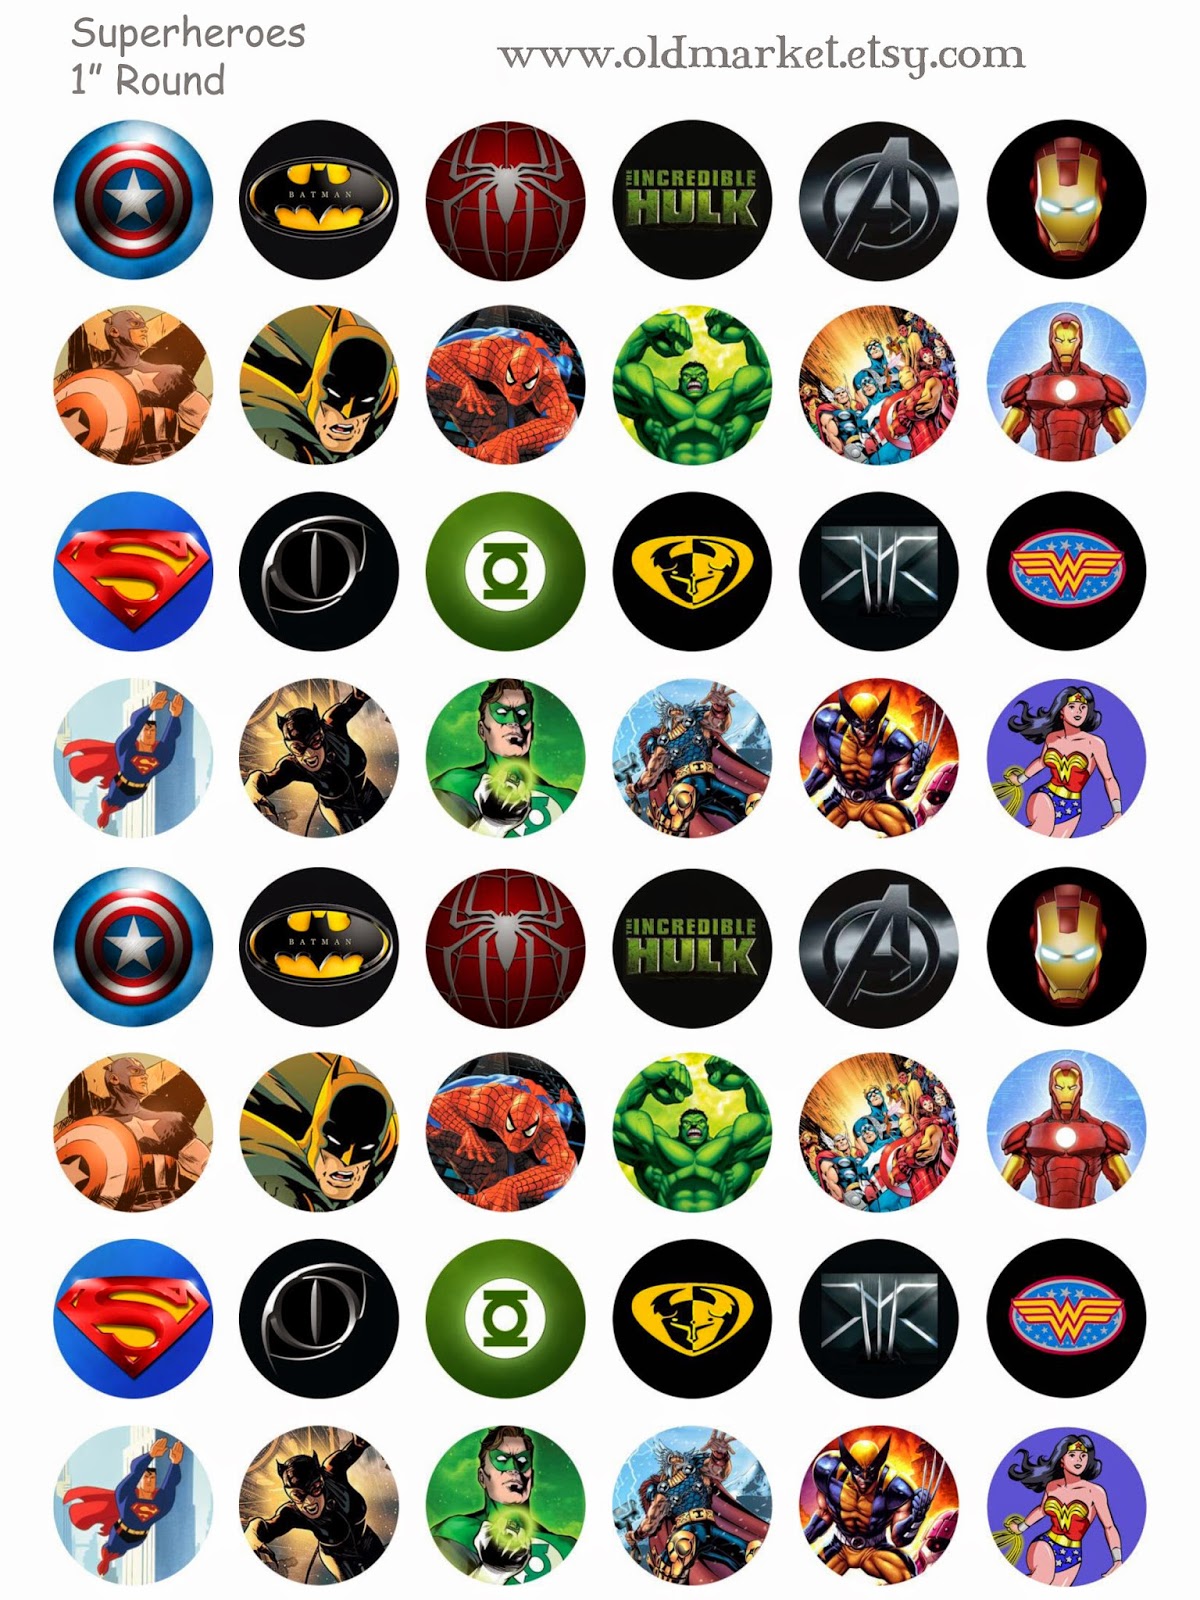
And to get you started, I'm adding a free page of 1" bottle cap designs.  This is just a sample of designs you can find at OldMarket on Etsy.  

To print , just left click over the side of the image (not on the P).  Then right click on the image and go to “save image as” then save in a folder as a jpeg.  The page is set up to print out on 8.5" x 11" paper.  When printing, make sure your printers settings are set for 8.5" x 11" (letter) size and the "fit to page" button is not clicked.